Help and Support
Issue
After installing the MyAssays Add-In for Microsoft Excel, the MyAssays feature does not appear in the Microsoft Excel ribbon. (This may occur if Microsoft Excel was installed before Microsoft’s .NET Framework was installed)
Resolution
1. Ensure Microsoft Excel is not currently running.
2. Open the PC’s Control Panel.
3. Select Add/Remove Programs (in Windows 7 select Uninstall).
4. Find the Microsoft Excel or Microsoft Office entry (depending on the product installed). This might be called “Microsoft Office” or “Microsoft Excel” or something similar.
5. Select Modify or Change.
6. The Microsoft Office/Excel setup program will launch. Select Add or Remove Features and press Continue.
7. Under Installation Options, expand Microsoft Excel. If a red cross appears next to the .NET Programmability support, this indicates that the required component has not been installed, e.g.: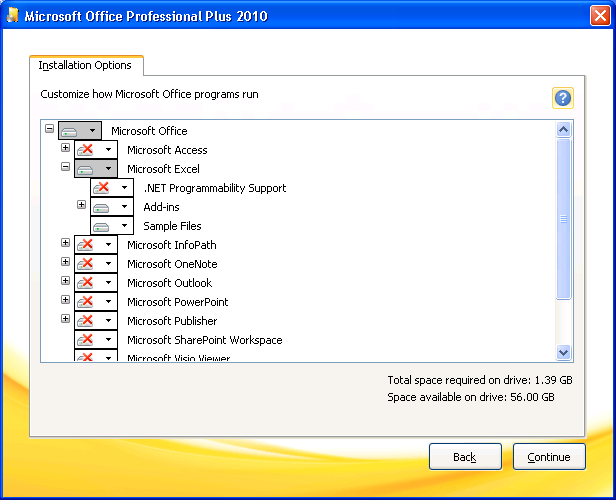
8. Click on the red cross next to .NET Programmability Support and change the setting to Run from my computer.
9. Press Continue to complete the setup modification.
10. When the modification is completed, launch Microsoft Excel.
11. In Microsoft Excel, go to File or Office button| Excel Options | Add-Ins.
12. Select Manage | COM-Add-Ins and press Go…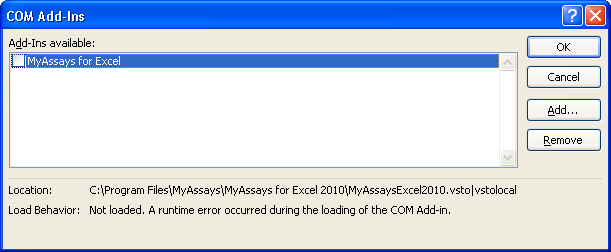
13. Tick the check-box to the left of the MyAssays for Microsoft Excel entry.
14. Press OK.
15. After a short wait the MyAssays feature will appear in the right hand-side of the Microsoft Excel ribbon.
16. Exit and re-launch Microsoft Excel as this activates the MyAssays Add-In for Microsoft Excel feature.
17. Test the Add-In is working correctly by selecting the MyAssays tab and opening Account. A dialogue box will be displayed for entering your account details.